Comparing stereotypical vs nonstereotypical

After reading Emily and the Dragon, we were discussing how Emily is not your stereotypical female character. Instead of students completing a Venn diagram comparison, we took it one step further and had students create an avatar of a stereotypical princess in the App WeeMee. This allowed for a fun discussion about her appearance; what hair style, hair colour, clothing options and leisure activities she “should” have.

They exported this image to their camera roll to import into a table created in Pages.

Before teaching a 1:1 iPad class, I never would have planned for Year 2 students to create a table for a Venn diagram. How times have changed! Not only do I transform their learning, I’ve also transformed my thinking of what students can and can’t do… really there isn’t much they can’t do with an iPad.

Give it a try!

iMotion Fairytales

Fairytales and movies go hand in hand. So I thought, iMotion would be a perfect match for our current English unit.

When introducing a new App, I always use concepts students have prior knowledge on so their focus is purely on discovering the App. I printed off images of the characters from The Three Little Pigs for students to use to create their first iMotion. I made a quick exemplar for the students to conceptualise what an iMotion final product looks like, showed them the basics and they were ready. We decided one  partner was to be the camera person and the other the moving person.


After they made their iMotion, they needed to export the video to their Camera roll and airdrop the video to their buddy, so they both had a copy and then individually upload to Seesaw for their parents and peers to view.

I was pleasantly surprised with my student’s team work effort and their reflections on their final videos. There were lots of ‘next time’ statements being made, which is excellent as NEXT WEEK we will be starting to collaboratively change stereotypical characters to non-stereotypical and I can’t wait as to what they come up with for the Little Pigs or the wolf. Stay tuned for next weeks iMotion update…

Give it a try!


Drawing a Nogard

I absolutely ❤️ teaching the fairytale’s unit! Who doesn’t love a happily ever after… or is it?

By the end of the unit, students are expected to write a non-stereotypical character description. To introduce the unit, I gave the students a Nogard listening activity. I read the below description to the class and they drew their interpretation…

The nogard is an animal. It has an oval shaped body. It has a long neck and tail. The top of the neck, back and tail are covered with a row of triangular shaped plates. The nogard’s head is shaped like a long triangle. It has big eyes and eyebrows that stick out. It also has big nostrils. Its body is covered with scales. The nogard has four short legs. At the end of each leg is a foot with five toes. Each toe has a sharp claw at the end. The nogard has two wings attached to its body. These are located behind the front legs towards the top of its back. Nogards are usually green but change to a deep purple during the winter months.

Students soon realise they are drawing a dragon 🐉 and Nogard spelt backwards is … dragon! They get so excited with this realisation.

I asked the students ‘are dragons evil or good?’ and where have they seen  these sorts of dragons. We established that stereotypically dragons are evil in fairytales but in some movies like ‘How To Train Your Dragon’ they are mostly good.

We then discussed what sort of dragon have they drawn, an evil or good dragon and why.

I find that if you start the unit encouraging students to think about why from the beginning, they will find it easier when they need to write a detailed character description later on.

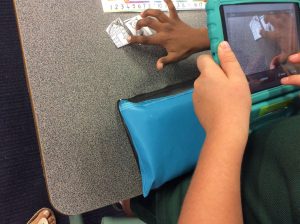
You may be thinking where do iPads come into this lesson…well students were so keen to share what sort of dragon they have created, however listening to 25 creations does take valuable class time 😔. However, thanks to the Seesaw App, every child posted their creation with an oral description for not only myself and their peers, BUT also for their parents to see.

If you do use Seesaw or are thinking to, I strongly encourage signing their parents up as well. Parents love getting notifications during the day to see what their child has created and it gives them something to discuss with their child after school. Instead of the usual ‘I learnt nothing today’.

Give it a try!

DQ aka Digital intelligence with Seesaw

Have I told you I love the Seesaw App?

It ticks so many boxes for a 1:1 BYO class.

I love that as a teacher I have complete control over my student’s digital communication journey. I have complete power to accept or deny their contributions (and their parents). However, they will take a while before realising why an item was denied. Which is why, I always explain to students why a piece was denied.

At times, I accept contributions that are a great learning point for all and discuss the reasons of appropriateness with the whole class. Take this example below…

We discussed the comment of ‘that was amazing’. I asked the students what they thought the comment was referring to. There were several suggestions as to what she could be referring to. We talked about when writing comments, they need to be specific so the reader knows exactly what you’re talking about.

Then I showed them this screenshot….

I had a photo of a puffin with the question ‘which country can you find Puffins in?’. We talked about the students who replied in response to the question, they did a great job.

Then we talked about the other responses such as ‘cool’ and ‘nice work’ which didn’t answer the question. I explained to my class that everyone saw these comments and once you hit ‘post’ you can’t take it back so before they hit the post button they need to think about if their comment is answering the question or providing useful feedback in a positive way.

Each time students post their work to Seesaw we talk about what would be an appropriate comment and what wouldn’t be appropriate. As educators it’s our job to explicitly build student’s DQ whilst they are young, so when they become teenagers they are cyber savvy.

Here are couple of infographics for DQ:

If you have any questions about how I use Seesaw, please write them in the comments below and I’ll get back to you.

Give it a try!

Editing with Seesaw

Are you a time-poor teacher? Gone are the days of taking home 25 writing books to edit overnight ready for the follow up lesson the next day thanks to the Seesaw App!

Have students upload their writing onto Seesaw ready for you to edit anytime and anywhere! Students receive your feedback ready for the next lesson. If you have eager beavers like I do, you’ll have some students take on your editing feedback before the next lesson… another benefit of a 1:1 BYO program.

Seesaw has many advantages for BYO classrooms and this idea is only one of them. If you haven’t signed your class up onto Seesaw…what are you waiting for? Click here to sign up to Seesaw.

Give it a try!

YouTube style procedure videos

Have you ever watched how to do something on YouTube? Chances are that your students have too and they all would love to be Youtubers! So instead of having the students write down each step of the procedure, I thought of transforming their learning by getting each student to do a selfie-video on ‘How to Brush Your Teeth’.

I chose the topic of ‘How to Brush Your Teeth’ as brushing teeth is a task all kids can do a little better. Have you ever smelt a kid’s breath in the morning??

Each student received their own new toothbrush and a small tube of toothpaste. I went through the correct way to brush and off they went.

Each and every student was engaged. They all went home and showed their parents and siblings.

Next time you’re introducing a new genre, remember to include time for oral presentations, especially selfie-videos!

Give it a try!

Editing using Camera

Mistakes are proof of trying!

Yes, that phrase is true… however if students don’t know that they’re making a mistake, they will not know what to correct when a teacher says to them to go back and edit their work.

Teachers need to teach students HOW TO EDIT.

Using an iPad’s camera is a powerful editing tool.

Carefully select a student’s work that has features that you are focusing on. The example I used above was to discuss the use of full stops. I read the sentences to the class and it wasn’t long before students identified full stops were placed at the end of each and every line.

This was a perfect moment to reinforce “whisper reading” for students to hear where the natural pause of the sentence falls and to check for the subject and the predicate in their sentences.

Give it a try!